Monday, July 15, 2024

Ways to use bottle lids

I like to reuse things when I can instead of them ending up in landfill. These are caps from UHT milk that have been collected by friends. Could use as counters but I have used them in literacy learning. Children could use the lids for creating their own sentences, making their names, making their friend's names or copying from a text like in the photo. 

There are so many ways to bottle caps for learning. 

  • Use as counters
  • Use them to make patterns with other coloured lids or mixed with other items e.g. shells, blocks
  • Add them to your collage area
  • Create art with them like they did here
  • Use it as an adjunct for building with small blocks or popsticks
  • Colour sorting lids
  • Use as paint stampers

I have also used them in a numeracy activity found here

Wednesday, November 13, 2019

Money Dice Game

We have been learning about money in my IELC classroom of year 4/5s. In this time I have observed that some of my students have been finding it difficult to add money amounts. I have been trying to think of ways to develop this skill in a variety of fun and engaging ways. 

Yesterday in the money resource box I found laminated cards which had single values written on them. I also found some dice that have little whiteboard squares on each side of the dice to write values (5c, 10c, 20c, 50c, $1, $2) on them. If you had coin dice, it would be easier as the whiteboard marks do wipe off during the game. 

In groups of 4-5, each student had a piece of scrap paper and pencil to record their amounts. They were given a card with a value on it by the banker (me). Taking turns they roll the dice and if the rolled value is less than the value on their card, they recorded it and had another roll. The idea is to continue rolling, recording the value, adding the amounts without going over their target value. If they rolled over their target value, the dice was then passed to the next person. Once they had made the exact value shown on their card, they received another card from the banker. The winner was the one who had collected the most cards.


If you were talking about change, then you could alter the game to have students roll the dice and if the value is higher than the value on their card, calculate the change/additional money to put towards their next card/target value. 

Tuesday, May 17, 2016

Maths Journal

One of the suggestions during my Natural Maths training was that as a studio (class) we keep a journal of our numeracy lessons. I have actually found that this works really well with my learners and acts as a quick revision at the start of the each lesson, as we look at what we did the previous lesson. I will be the first to admit, it is just another task that has to be done daily and there are times where I struggle to keep it up to date. I started out making each page quite elaborate last year and it just wasn't sustainable. This year I have simplified the structure with a couple of photos and quick explanation. Sometimes I will glue the photos on and as a group we construct the explanation together. 
I bought this very cheaply from the Reject Shop


Saturday, May 14, 2016

Creating Toy Town

Loosely following the lesson plans from Ann Baker, my students made "Toy Town". They began by making a house for a teddy bear and we progressed to constructing a little town for the rest of our toys. We first brainstormed what types of buildings would be found in a neighbourhood and went from there. You can find the lesson plan in the Ann Baker Natural Maths Strategies: Beginner Level 4-5 Years.
The photos below show the town they made.


Then following another idea from Ann Baker's books, we decided we would draw a map of our Toytown. Mapping was something that was totally new to my students and we will continue with this learning over the year. 

I decided to begin the task, we would make the map together. I put the photo up on the board and we traced around the parts of the map with a whiteboard marker. 

We then turned the projector off and were left with an outline, which the students copied.


Tuesday, May 10, 2016

A bottle cap resource - Fill in the Missing Numbers

I went to a Jolly Phonics training session a few years ago and there they showed us the idea of using bottle caps to write letters on them so children can make words. This is a great idea simply because they are durable and if lost, very easily replaced. I have since become a little obsessed with bottle caps and people gladly hand them over. I have taken the idea and used bottle caps to make a "Fill in the missing numbers" game. 


Friday, April 22, 2016

Using table top space

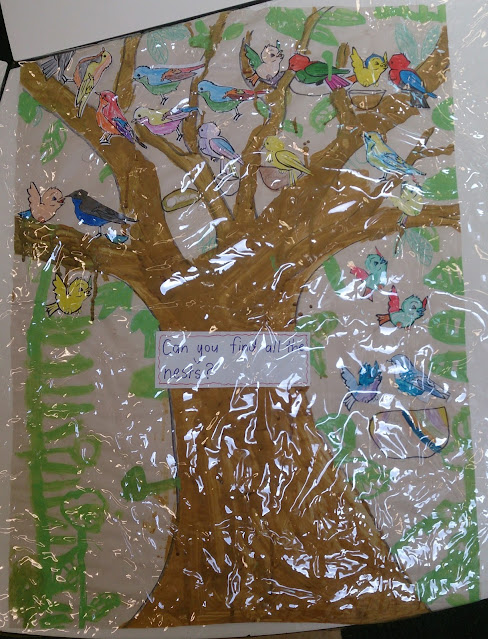
I have limited space to display work on my walls. I have 2 pin up boards and am not allowed to hang anything directly on the walls. I also have plain white laminate tables, which do not really match the rest of our studio and so I solved both problems. 


I bought the clear plastic from Lincraft but you can find it in many places. The plastic has flattened out over time, however you could lay them out in the sun to or use a hair dryer on a low setting to smooth it out.

The students have responded well and asked for their work or photos to be displayed on the tables. They do get dirty still and some students may get creative with the scissors around the edges but I am still happy with the decision.

Monday, March 7, 2016

Our Backyard Role Play Area

This term we are learning about homes. As usual I have been planning with the teacher in the next room and part of her room has been set up as the inside of a house, and I have set up my room as the outside of a house. It is complete with an outdoor setting, plastic dinner set from Ikea, a weber from Kmart ($15) and some fake grass from Bunnings. I have also been busy making some felt food and will endeavour to find some children's aprons. 

Our word wall will be used to display vocabulary and pictures related to homes.

Friday, February 5, 2016

Our first recount of the year

One of the first things we did this week was make a joint picture about our holidays. It was actually interesting watching their interactions and problem solving to enable all students to have space and resources. They did really well and all of my EAL students were able to participate.


Friday, November 20, 2015

Camping Role Play Area

I have recently removed my supermarket and Chinese restaurant role play areas and replaced it with a campsite. 


 This is a 2 person tent but it would work just as well with one of those pop up sun shelters. Notice our 'rock' to fish from.


 As the poles would usually be held down with guy ropes and pegs, they will not stand up freely. I had to use a rubber band around the base of the poles and the tent loops. 


 This magnet fishing game was bought from Kmart. Children place the material however they like to create the 'water'. The jar isn't exactly authentic but it stops the strings from being tangled.


These are vocabulary flashcards I made using a Google image search (free for non commercial use). 

The plan is to go on a bit of a 'hike' around the school to find some sticks for a fire and add this to our campsite. 

Sunday, November 8, 2015

Use those old calendars

Okay, so people say that teachers never throw things away and I for one am guilty of that. With an upcoming house move and possible classroom move, I HAD to clean up my study at home. I decided that unless I could use it now or in the very near future, it could not stay. It has been working well because it has forced me to actually get moving on all those projects I have swirling around my head. 

What I did find was a pile of old calendars, which I had kept probably to use as posters or the photos were just too nice to throw away. I've now made use of these in two different ways. 

The first, I have used to make a birthday chart. With limited wall space, I don't have a birthday chart hanging up but this is a good solution. 

Each page is placed and stapled inside a plastic sleeve, which can be written on with a whiteboard marker. The sleeves are then stapled together and the edge is covered with thick tape. 

I used a coloured piece of paper behind each picture to hide the used calendar on the back. 

I am also always looking for different ways to encourage writing. I used these calendar pictures of animals to inspire students. 

Like the birthday chart, each page is placed in a plastic sleeve to make for easier cleaning. Children then write a sentence/word/story about the picture. What I like about this is that it is suitable for a variety of abilities.